
NUC Squarepants
My first Intel NUC was yet to be delivered, but I was already looking around for a solution for it’s greatest shortcoming: the single Ethernet adapter. So, here is how my first attempt at solving that went.
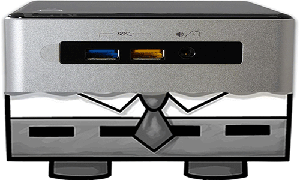
As I mentioned in my previous post about the evolution of my home lab, I decided to test the waters with an Intel NUC DC53427HYEA. I was as yet unsure as to whether or not the NUC would be an ESXi host, but I knew I could run Windows Server 2012 on it. If I couldn’t get a second NIC for ESXi, the NUC would still have a purpose as my new Domain Controller.
As an aside, I chose this older NUC model, and later the NUC5i5RYH, because they are the only models in the line up to include Intel AMT. I think running with slightly older models is a price worth paying in exchange for remote out-of-band management.
Well, back to our quest… I am averse to reinventing the wheel, so I started by searching for existing solutions, and found surprisingly few: this Adding a second NIC to a 5th Gen Intel NUC by Florian Grehl, and this Adding a Second Ethernet Port to an Intel NUC via Mini PCIe by Stephen Foskett. Both solutions are very imaginative, but not quite what I had in mind.
I didn’t like the idea of running a full length PCIe Ethernet adapter outside the NUC enclosure like Florian did. Plus, there is a need for a second 12V power adapter to drive the NIC. Ah, and I didn’t have a 5th generation NUC as yet…
Stephen’s solution was closer to what I had in mind, but not quite. Using a Mini PCIe Ethernet adapter housed inside a custom base sounded just right for my NUC model, but I din’t fancy soldering the adapter directly to the board! However, I did like the idea of a custom 3D printed base for the NUC; I thought perhaps I could combine the best aspects of each approach: a Mini PCIe Ethernet adapter connected by some sort of extender, and housed in a custom base. Sounded simple enough!
Stephen had posted a link to his 3D model, so that is what I started with. Unfortunately, the design was only available as an STL file, which I didn’t have the skills to modify the design for my own NUC model. His custom base was also meant to house a 2.5” drive, something I didn’t want or need. Luckily, a chap called David Johnston had already remixed Stephen’s design and published it in Parametric OpenSCAD format on Thingverse, ready to be modified. The OpenSCAD format is described as code, something that felt more natural to me.
Without further ado, I present to you the NUC Squarepants design:
OK, it doesn’t look quite like that. We will see how it really looks like in a while, but first, here is the shopping list.
Components
- Intel NUC 3rd or 4th generation (with mPCIe/mSATA)
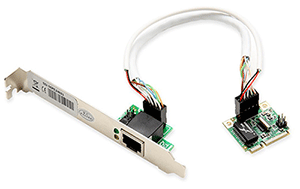
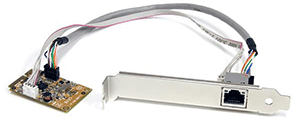
- Syba Mini PCI-E Gigabit Ethernet Card or
- Startech Mini PCI Express Gigabit Ethernet Network Adapter
- Mini PCI Express Extender
- Modified SCAD file for the 3D base
The StarTech adapter costs twice as much as the Syba. I bought both and would say the Syba is a better bet, as the performance is identical (both are based on the Realtek R8111 chipset).
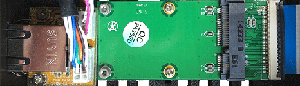
This is what the Syba and StarTech adapters look like:
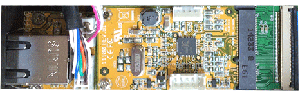
And this is the mPCIe extender:
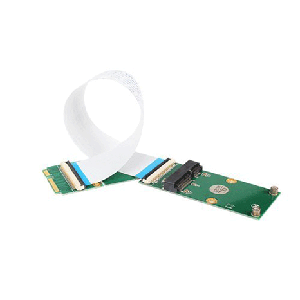
Note: The small board on the left is connected to the mPCIe interface in the motherboard.
Putting it all together
1. Remove the bracket from the Ethernet adapter, disconnect the cables and fix the RJ45 daughterboard to the custom base.
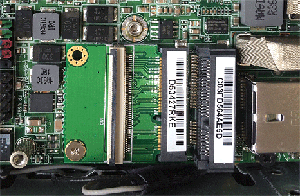
2. Connect the extender to the lower slot on the motherboard (the top one is mSATA). There are perforated lines in the PCB marking where to snap it according to the required length.
3. Fix the second half of the extender (with the mPCIe connector) to the custom base.
4. Plug the main board of the Ethernet adapter to the extender in the custom base:
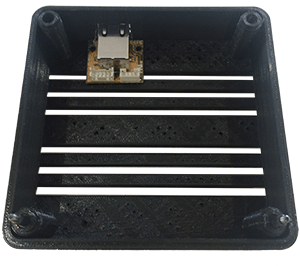
5. The custom base should look like this once all the cables are connected:
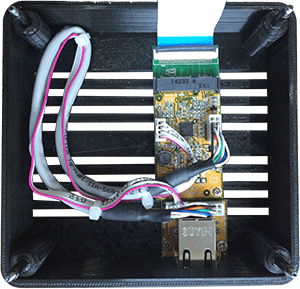
6. Connect the flat ribbon between the base and the main board:
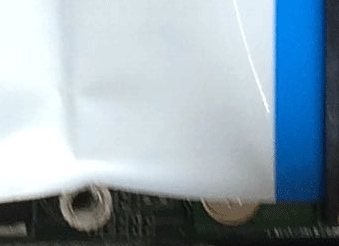
Note: The flat ribbon is tucked away slightly to clear the stand-off for the mSATA adapter
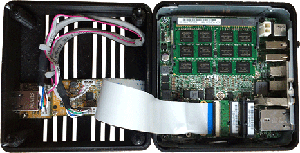
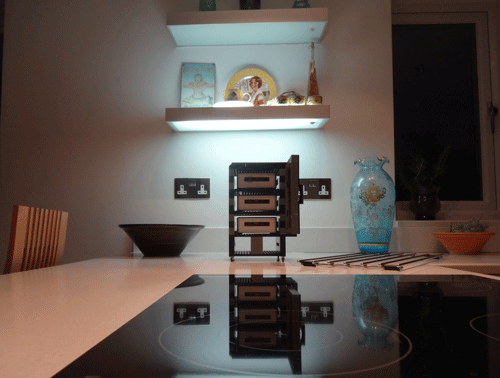
7. Carefully loop the flat ribbon and attach the custom base to the NUC. The base was designed with long screw posts to accommodate the original screws. Et voilà, the real NUC Squarepants:

So we now have a NUC with a new pair of pants large enough to accommodate it’s extra package. Oo-er missus!
I know, I know. That is not a pair of pants, the base is not really square and there is no tie… but I like the name NUC Squarepants. I must be going senile.
Making it all work
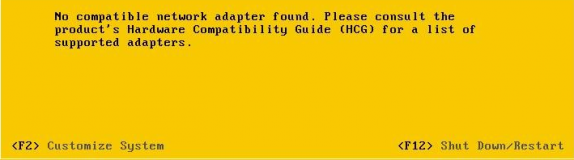
There is no out-of-the-box support for Realtek adapters on ESXi, so a driver will need to be installed. I will just point you in the direction of the excellent VIBSDepot – just grab the net55-r8168 VIB and you should be sorted.
Note: If you are not running ESXi 6.0 or 5.5 Update 3, you will also need a driver for the on-board Intel NIC. You need the net-e1000e VIB, so get it too whilst you are at it.
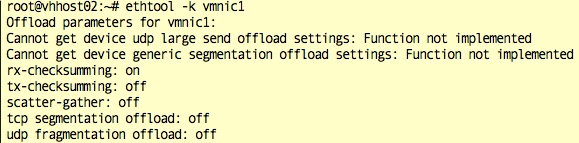
Ether device details
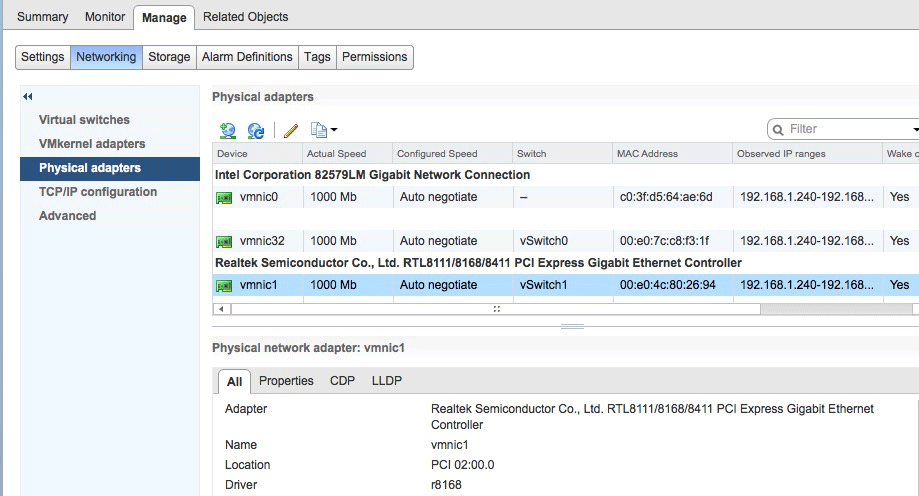
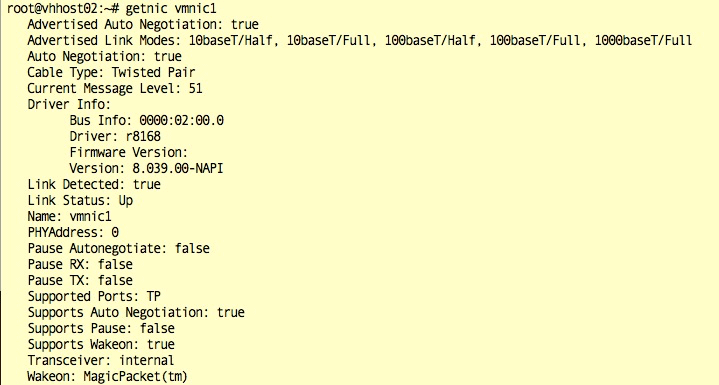
Interestingly, only rx-checksuming is enable for this driver; there is no way to set tx-checksuming, sc and tso, but the driver throughput is on a par with the Intel onboard NIC.
Later generation NUCs
This solution does not work for the 5th and later generation NUCs, as the mPCIe slot has been replaced by an M.2 slot. If you don’t mind running with a NIC outside the NUC case and a second power adapter, then Florian’s solution is an option. Otherwise, come along this way for a solution that will work on all generations of the NUC (or anything else with a USB port).

Leave a Comment