
iTunes Media Folder on NFS share
Mine is a Mac household and as such, iTunes plays a part on our entertainment strategy. I generally like Apple products and software, but I must confess iTunes is not one of my preferred offerings from them.
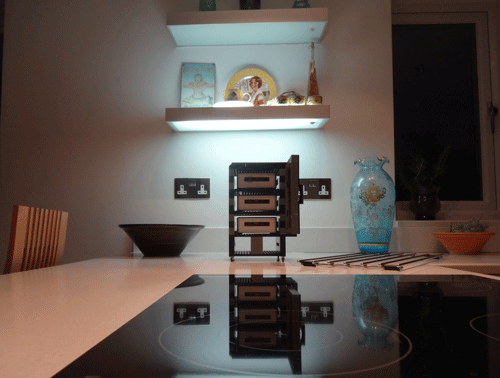
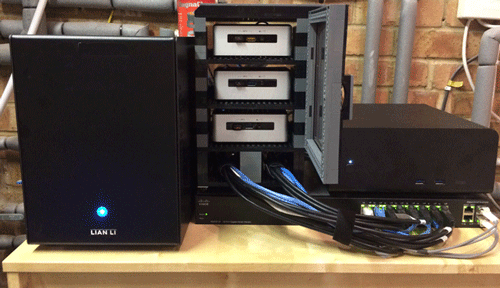
I thought it would be a good idea to have a single repository for all the iTunes Library items residing on the NAS. By the way, the setup I have at the moment is based on two custom built FreeNAS 9.3 servers, but in the past it was based on Solaris 11 (then 11.2) running on a Sun Fire X4240. You can see what my current home lab looked like here – I will be documenting the new setup soon.
All those funny characters
The reason I chose Solaris and later FreeNAS was simply because I wanted all the ZFS goodness. With ZFS, not only did I get top availability, but both NFS and SMB sharing are baked straight into the file system. Setting up a new ZFS file system and sharing it at the same time is a doodle – except the first attempt turned into tragedy. I do have an extensive music library that includes music from all over the world. Whilst it was easy to move everything onto the NFS share, what I forgot to account for was the non-ASCII characters… As soon as I tried to access albums or songs that had, say, accented characters the whole house of cards fell apart.
What I needed was UTF 8 support. Not only that, but UTF 8 support that was compatible with the Unicode normalisation adopted by Apple, which is NFD. This is not something that can be changed once a ZFS file system is created, so I had to destroy the file system and recreate like so:
zfs create -o normalization=formD -o casesensitivity=mixed -o nfs=on \
-o aclinherit=passthrough-x -o aclmode=passthrough -o compression=on -o utf8only=on tank/media
Now, lets forward on a few years and see if the same had to be done on FreeNAS. It turns out it didn’t. Instead, what I did was to change the “charset” and “lang” login options to support UTF 8. To do that, as root, edit /etc/login.conf and add the following lines to the default: stanza after the umask entry:
:charset=UTF-8:\
:lang=en_GB.UTF-8:
Save the file, then run the following commands:
cap_mkdb /etc/login.conf
cp /etc/login.conf.db /conf/base/etc
cp /etc/login.conf /conf/base/etc
I suppose I could have done the same with Solaris and just set the charset and lang to UTF 8, but hey.
Note: Don’t try to add directories or files with UTF 8 characters directly from the command line – use the Finder instead and all will be peachy.
Automount is your friend
With my NFS share in place, I then had to look at the best way to make it available at boot time. If you look around t’interwebs, the default solution is to use the “Connect to Server” dialog in the Finder. That is not very elegant and in my experience does not survive a reboot. Well, you can add the driver to your “Login Items”, but that is even uglier. Instead, I opted for an automount map. The great thing about Mac OS X is that it is still BSD at heart, and the tools are all there.
So, start by creating your auto mount map, as root, using you preferred editor (I am a vi man):
/Media -fstype=nfs,rw,bg,tcp,rsize=32768,wsize=32768,resvport,intr,nolocks,locallocks ip_address_or_hostname:/mnt/tank/media
I normally use the IP address so that it doesn’t depend on DNS resolution, but you can choose otherwise. In this case, my ZFS share is called media and I am mounting it under a folder called /Media.
Do not create the mount point directory (/Media in this case). The directory will be created automatically on first mount.
Next, add your newly created map as the last item on /etc/auto_master, also as root:
/- auto_nas -nosuid
You are now ready to mount your NFS share, by executing the following command:
sudo automount -vc
That is it. If your handy work is correct the NFS share should be mounted under /Volumes/Media and ready to go.
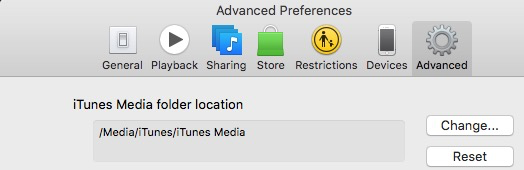
Point iTunes to the new media folder location
The last thing to do is to set the iTunes Media folder location to point at the NFS share. Click on iTunes –> Preferences –> Advanced –> Change… and set the the media folder location:
That’s it
Now, this is not quite a single iTunes Library for everybody, but it is the next best thing.
I tried removing the “iTunes Music Library.xml” file from the local computers and having a single instance on the NAS, but that doesn’t work well long term. What it means is that if a new item is added to my library it will not be automatically added to my wife’s library – that needs to be done manually. On the other hand, I actually prefer this setup, as I don’t necessarily want some of my wife’s music on my library anyway… 😉
If you are NFS mounting your media library on a laptop and are out and about, the contents will not be accessible. If you want to have your media on the go you need to store your files locally. Or ran a VPN, as I do.

Leave a Comment